Searching for shoeprints
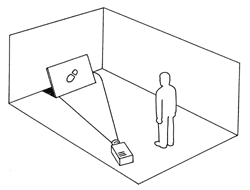 |
Figure 1: Positioning the light source and mirror |
Searching for shoeprints on dark-colored surfaces can be successful if oblique lighting is used. The shoeprints that may be present normally contrast well against a dark background. Unfortunately, this technique is rarely useful for light-colored surfaces, on which shoeprints contrast poorly or not at all.
If fingerprint powders are used to find and visualize prints, the fine details in a print may be damaged or completely obscured.
In the worse case, the shoeprints are overlooked completely.
A good technique to visualize shoeprints on lighter floors and other surfaces uses high-intensity oblique lighting and a mirror.
|
|
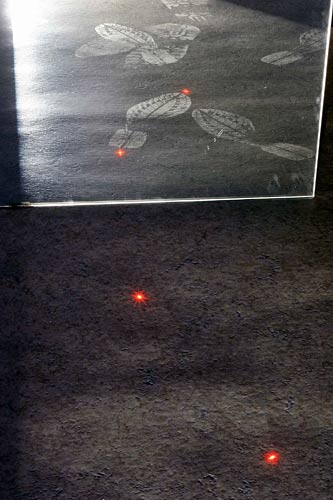
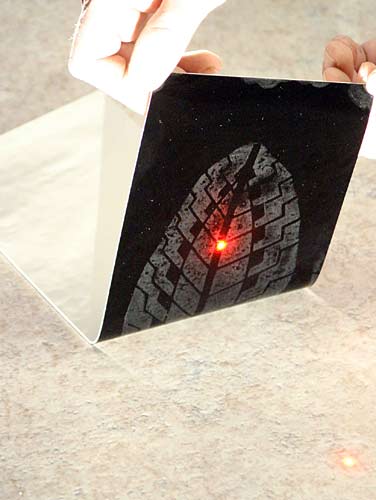
Image 1: Use two laser pointers to indicate the shoeprint on the floor. |
|
|
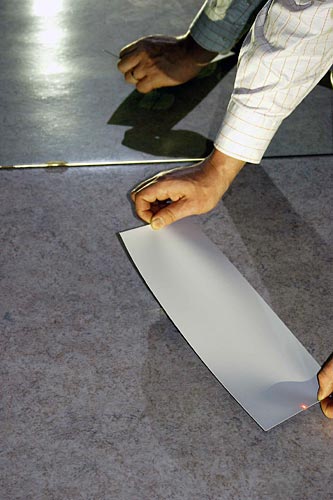
Image 2: Apply the Gellifter so that the center-point of each end covers one of the laser dots. |
|
|
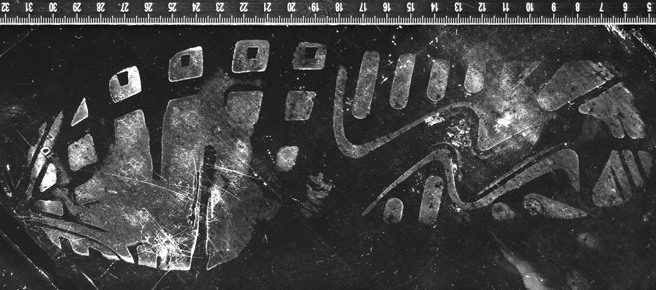
Image 3: The shoeprint is lifted. |
Step 1
Position a mirror to stand on the floor to be examined. It should not stand upright but lean backward at a slight angle (figure 1).
The angle depends on the distance between the mirror and the point from which you view the mirror. The closer you are to the mirror, the larger the angle must be. For example, if you are 6 feet from the mirror, its angle should be about 20 degrees from upright. At 12 feet, the angle is about 10 degrees.
Step 2
Use a high-intensity light to create oblique illumination (search light, ALS, or alternatively a slide projector). The path from the light-source to the mirror must be diagonal, at an angle of about 30 degrees in relation to the mirror surface (figure 1). The shoeprints, if present, are now visible in the mirror. However, your distance from the mirror and the angle of the mirror are crucial to the result. Adjust these two factors until you get an image in the mirror that approximates what you would see without the mirror if you laid your head on the floor.
Step 3
Once the traces are visible in the mirror, they can be lifted. This will require that you move toward the mirror. In doing so, you will note that the traces you just saw in the mirror will disappear. (As already mentioned, your distance from the mirror and the mirror angle are of utmost importance.) To prepare for this, use two laser pointers to indicate the shoeprint on the floor. Place one in the center of the toe of the shoe and one in the center of the heel (see image 1). Aim with the laser pointers on the floor in front of the mirror, and follow the movement of the dot while looking at the mirror.
At this point you know exactly where the print is located, and you can lift it with a black Gellifter. Holding the Gellifter by its two short ends, plan to apply it so that the center-point of each end covers one of the laser dots (see image 2). Apply one end first, then work toward the other. We recomment using a rubber roller to avoid any air bubbles.
Step 4
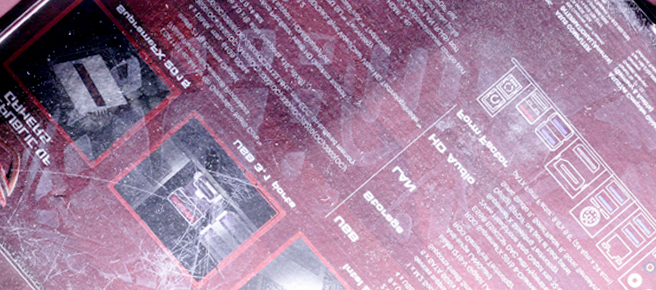
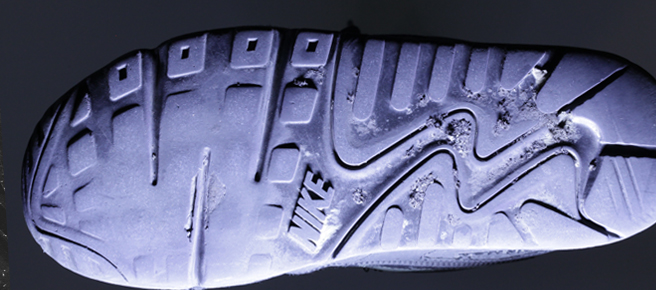
The shoeprint is now lifted and can be taken to the lab for photography and further examination. Image 3 shows the actual color of the floor from which the sample print was lifted.