


Product #
Description
#
Add
E-6600
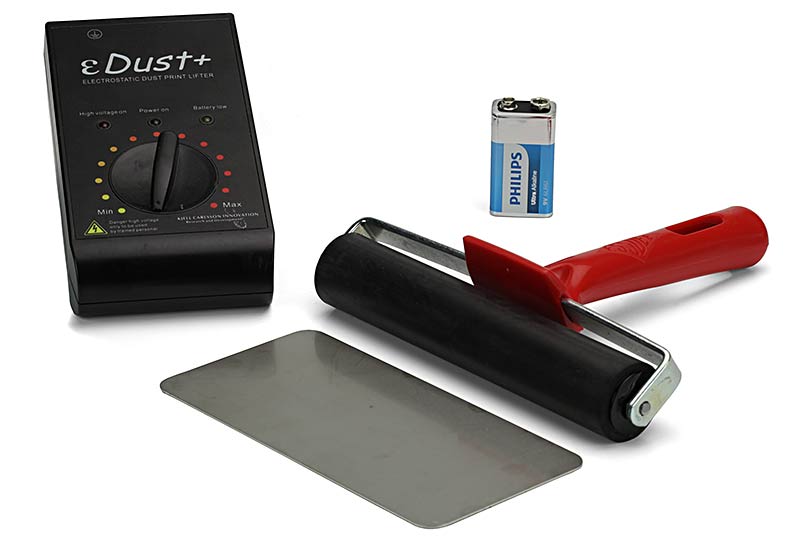
Electrostatic lifting device, Electrostatic Dustprint Lifter
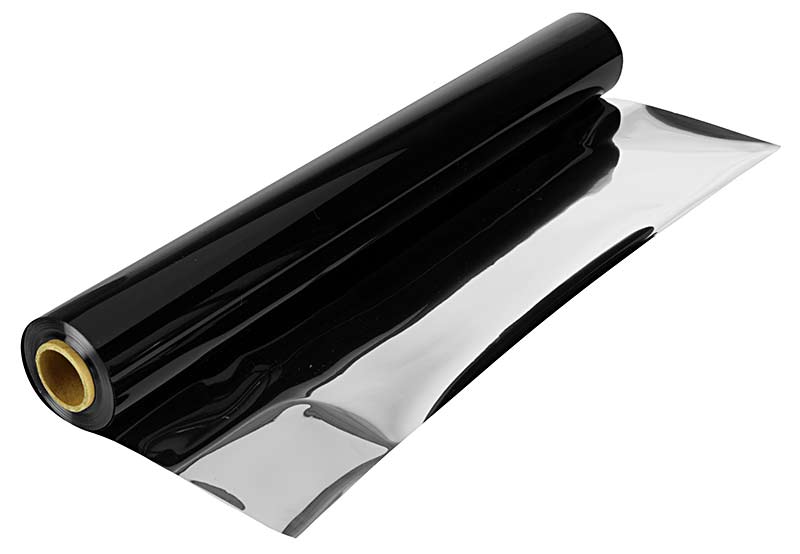
E-701500
Electrostatic lifting film, 40 cm x 30 meter
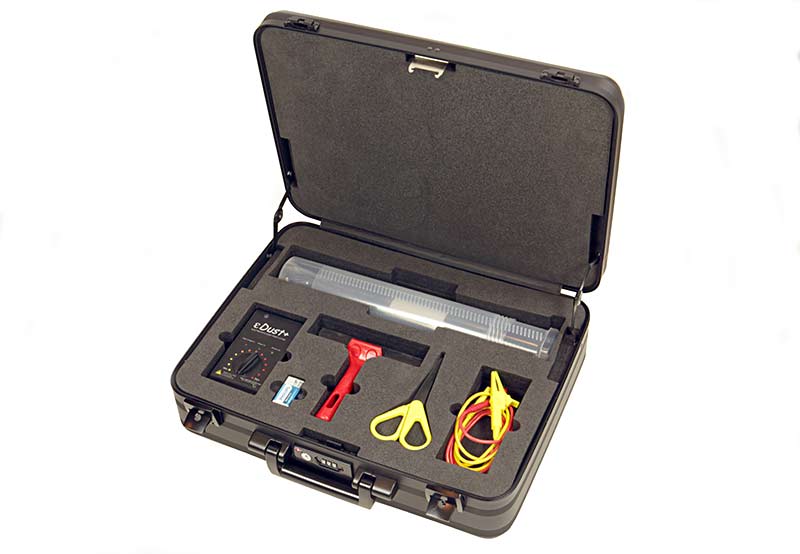
Plastic case with foam interior containing:
Electrostatic film (40 cm x 30 meter) on a roll in a plastic container
Dimensions of the case: (l x b x h): 35 x 32 x 6.5 cm
Weight: 4.5 kg
- Electrostatic Dustprint Lifter (ESL device)
- metal ground plate
- spare battery (9V, PP3)
- roller with plastic handle, 15 cm wide
- manual
Electrostatic film (40 cm x 30 meter) on a roll in a plastic container
Dimensions of the case: (l x b x h): 35 x 32 x 6.5 cm
Weight: 4.5 kg
Lifting shoeprints from a non-conductive surface
Most lifts will be made from this type of surface e.g. wood, parquet c.q. laminate, carpet, tiles, upholstery etc.
1. Place a sheet of lifing film with the black side on the surface with the mark to be lifted or what is to be examined for shoe prints. If the mark is on a vertical surface use tape (e.g. masking tape) on the highest edge of the film to hold it in place.
2. Place the ground plate next to the lifing film 1-2 cm away from the film but without making contact. Use tape to hold the ground plate in place when the surface is vertical.
3. Place the switched-off εDust+ (dial less than minimum, ‘Power On’ light off) so that the two ground pins are on the ground plate and the high-voltage pin is on the metallised side of the lifing film. Place the roller with non-conductive handle within easy reach.
4. Switch on the εDust+ by turning the dial clockwise. The green ‘Power On’ and red ‘High Voltage On’ lamp should now turn on. If the green lamp does not come on, check or replace the battery.
The red ‘High Voltage On’ diode indicates high voltage on the respective electrode. If it does not turn on, check that the εDust+ is properly placed on the ground plate (both electrodes must be on the plate).
5. Increase the voltage by turning the dial clockwise. The lifing film should now be clearly drawn towards the surface. If the electricity on the metallised side starts to strike through or sparks are drawn lower the voltage. Remove air bubbles between the film and the surface with the roller (with non-conductive handle).
A stone floor will require a lower voltage than a wooden or PVC floor.
6. Switch off the εDust+ by turning the knob counterclockwise past the ‘Min’ position (the ‘Power On’ LED should now go off) and remove the εDust+. This will also turn off the red ‘High Voltage On’ LED. WARNING: removing the εDust+ from the ground plate switches off the high-voltage power supply but the high voltage on the electrode is not immediately gone. It is gone only after about 20 seconds. So put the εDust+ away in a safe place after removing it from the earthing plate.
7. If the lifted prints(s) cannot be photographed immediately store the lifing film in a suitable cardboard box, stuck with some tape (masking tape has relatively low adhesive strength and can be removed from the film more easily than other tapes). If a roll of film was used, roll it up tightly (so that the surface cannot slide over each other) and store it in a cardboard tube.
Lifing shoeprints from cardboard and other non-conductive objects
Sometimes a shoeprint is located on a loose object with poor conductivity such as a piece of cardboard. In that case, you can get a good grounding by cutting a piece of lifting film and placing it underneath with the conductive side facing the cardboard. The recording film for the shoe mark with the black side facing the cardboard. Using the cables for grounding and high voltage, the connection is then made. The two grounding pins under the εDust+ must be placed on the grounding plate otherwise it will not turn on.
Lifing shoeprints from a conductive surface
The difference with lifting from a non-conductive surface is that the grounding plate is laid on a sheet of sturdy plastic (e.g. a gelllifter cover sheet). Place the insulating plastic sheet 5 cm away from the mark to be lifted and then place the grounding plate 6 mm from the edge of the plastic closest to the recording film. Now lay the recording film on the track keeping a minimum distance of 2.5 cm between the film and grounding plate.
Now proceed as described for a non-conductive surface from point 3 onwards.
Do not try to record the trace without the insulating plastic between the grounding plate and the surface!
For vertical surfaces, fix the insulating plastic sheet, grounding plate and recording film with masking tape before placing the εDust+ and recording the trace.
